How to cut your assets for animation
March 6th, 2025
If you're diving into the world of 2D skeletal animation with Spine for the first time, you might have come across a common question: How should I prepare my assets for animation? Below are some tips to help you get started and make the most of your animation process.
Draw also the hidden parts of assets
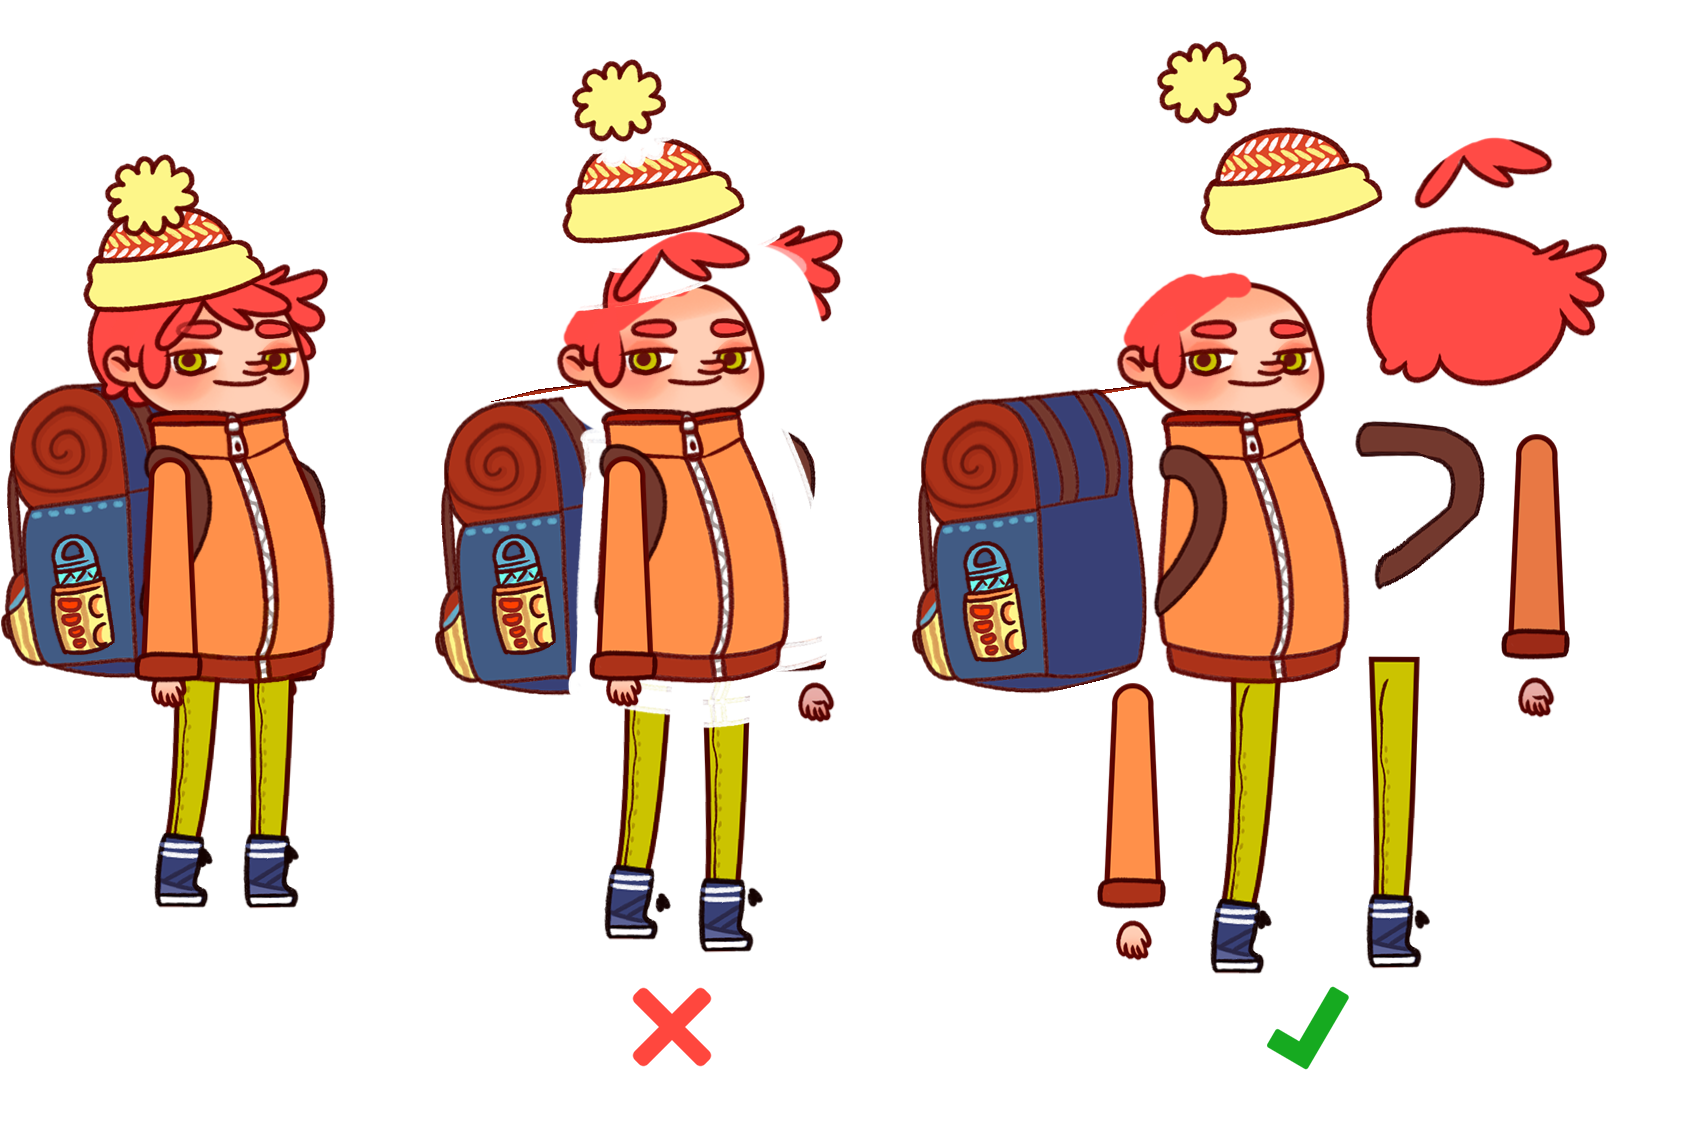
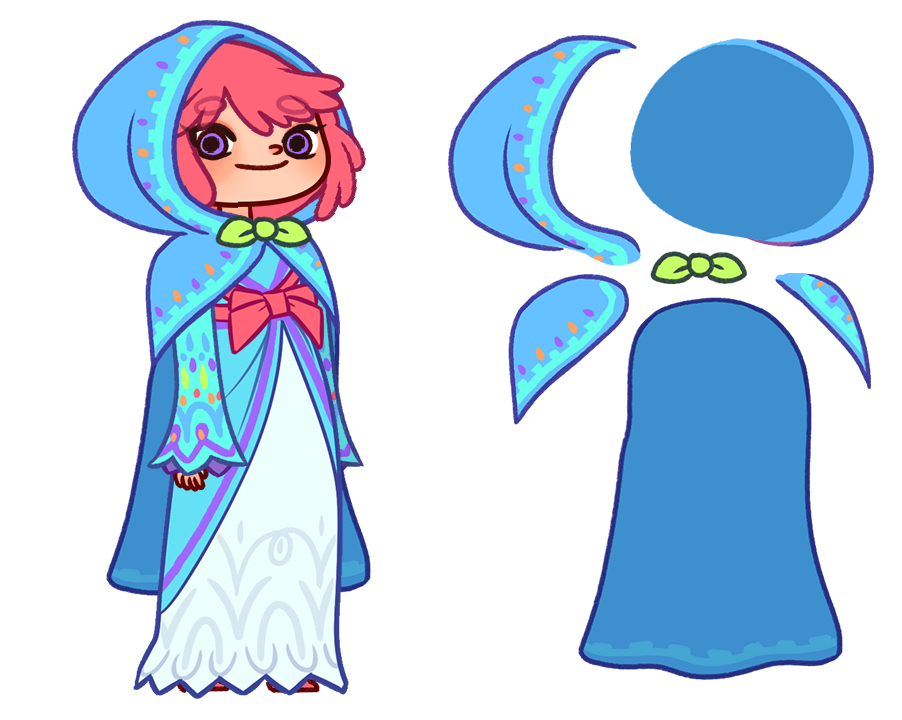
When creating assets, it's crucial to draw even the parts that are usually covered by other assets. For example, if you're drawing hair that's partially hidden behind the head, make sure to draw the entire hair, not just the visible portion. This extra effort ensures that when the hair is rotated or moved, the hidden parts are ready to be revealed without any awkward gaps. This also maximizes the range of motion possible for a given asset.
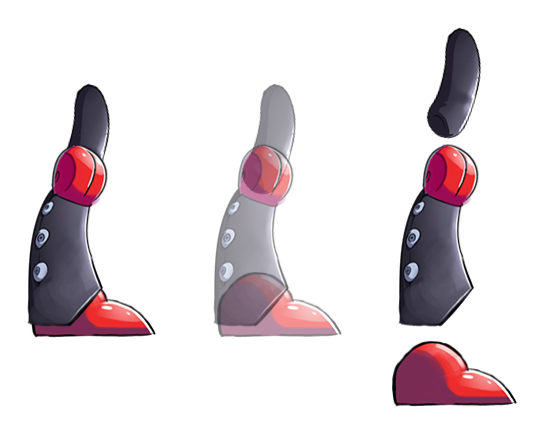
Rounded ends
For smooth and natural limb movements, it's essential to focus on how you draw the joints. When drawing limbs like arms and forearms, aim to leave an area as close to a circle as possible where the joints overlap.
Ending overlapping parts in a round way ensures no gaps are shown and maximizes the usable rotation. In general, if you're unsure about how to end a part that overlaps another, rounding it off is usually a safe bet. This is particularly important for parts that need to rotate around their attachment points, such as shoulders or elbows.
Straight images bend better
When designing assets that need to bend, start with straight images. Straight images can be bent in both directions, giving you more flexibility. Starting with an already bent image and trying to bend it in the opposite direction often leads to unsatisfactory results. If you're unsure about how to straighten something that should always have some curves, such as wavy hair, aim for its most relaxed state, where it is not perturbed by wind.
Additionally, avoid drawing images diagonally, as this can be less efficient. Diagonal images may occupy more atlas space than the same images oriented vertically or horizontally, unless you are using polygonal packing. Also the generate button generates a uniform grid, but this won't be helpful if the image contents are at an angle.
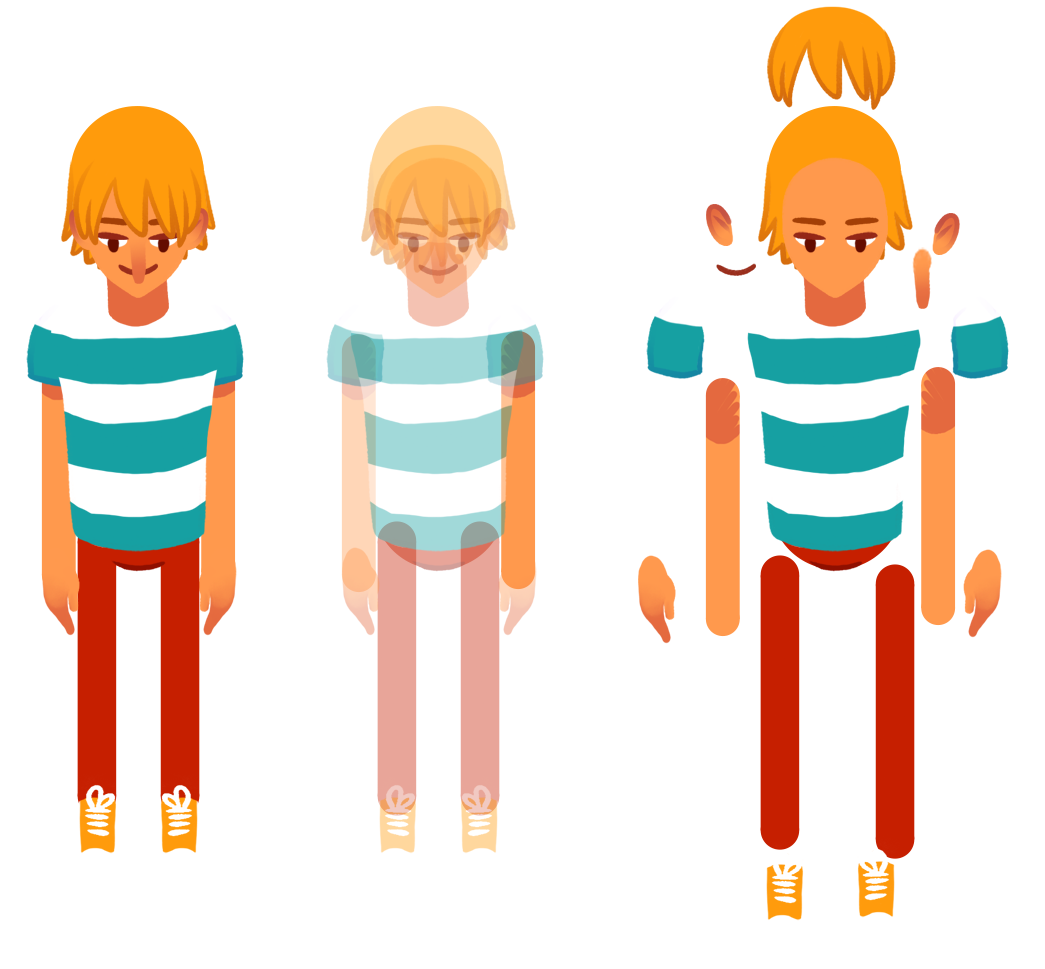
The more you separate, the wider the possibilities
One of the key aspects of animation in Spine is the ability to move parts independently. To achieve this, draw each part you want to animate separately and place it on its own layer. The degree of separation is up to you and depends on how you plan to animate each part. However, remember that without sufficient separation, animating individual parts can become challenging and might restrict your creative possibilities.
Front and back on separate layers
Avoid drawing elements that will appear in front of and behind an object on the same layer. For instance, if you're animating a character with a cloak that moves in front of and behind their body, ensure that the parts of the cloak are drawn on separate layers. If they should connect at a middle point, draw that point on both and, once in Spine, ensure that both have the same weights to tie the images together. Using weld will give you a perfect match!
Outlines for rotations
When working with an art style that has an outline, it's helpful to include outlines both above and below the limb section they should be intersected with. By doing this, you ensure that the outlines are preserved regardless of how the limb is rotated. If you look at the GIF below for example, this technique is used both on the forearm and on the hand. It allows the forearm to overlap the upper arm without merging into it, and it gives the hand greater range of rotation while still feeling attached to the forearm.
Use tags on your layer names
Spine can now directly import PSD files. This is much faster than the old PhotoshopToSpine script and allows you to use any image editing software that can write a PSD file. Tags can be added to layers and groups in your PSD, allowing you to manage your assets efficiently outside of Spine and create a streamlined pipeline from your preferred drawing software to Spine. Just add tags to your layer and group names and Spine will automatically process them for you on PSD import.
Make sure the document color space is set to RGB and not CMYK or you may have surprises like duller colors after exporting. And don't forget to add an origin so that adding new assets will be a breeze!
Additional resources
Spine provides a wealth of resources to help you understand how to structure and animate your characters effectively. On the examples page you'll find several downloadable examples of finished characters. Additionally, the Twitch stream files offer live demonstrations and further insights into the animation process. These examples are invaluable for seeing how professional animators organize and structure their assets. The streams are long, so use the filters and chapters to find the information you are interested in.
By following these guidelines, you'll be well on your way to creating polished and professional 2D animations with Spine. Join us on the Spine forum to discuss this post. Happy animating!